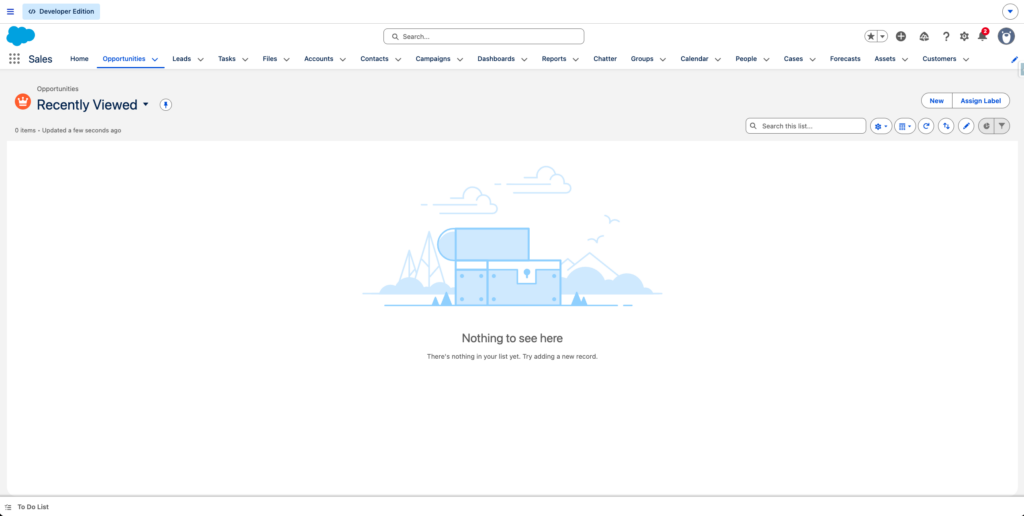
We have all been there: the initial Salesforce login. You set your password, tell Salesforce the city you were born in, and finally land on that familiar, or maybe not so familiar, home page. You made it. You’re in! But now what? Where do you begin? And is it just me, or does it feel a little messy?
You see, Salesforce was built for everyone, which also means it’s not really built for you and your specific work. The good news? In just a few minutes, you can make small customizations that will save you hours each week.
Who is this for? Salesforce End Users as well as Internal Admins and Consultants who want to share this article with their End Users in order to increase adoption, interest and value of the Salesforce Platform.
In this article, we’ll cover three simple ways to improve your Salesforce experience:
- Customizing your navigation bar
- Bookmarking a dashboard
- Pinning a related list view
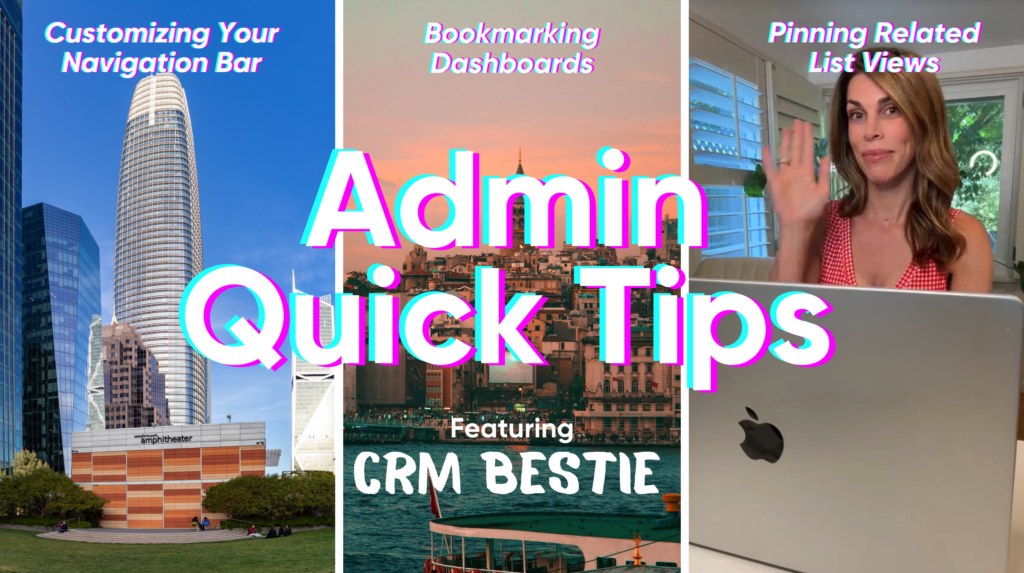
Please note that we’ve got some great short videos posted throughout this article from CRM Bestie, use these links to give her follow and let her know we appreciate her support for our community 🎉
Customizing Your Nav Bar
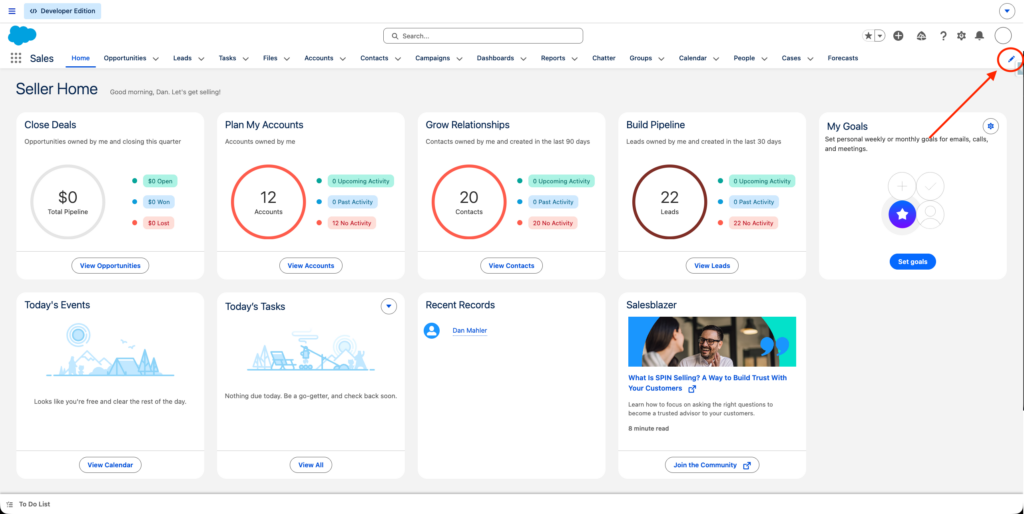
The navigation bar is the list of objects across the top of your desktop or the bottom of your mobile app: Accounts, Contacts, Opportunities, and more. These are also known as tabs.
Each Salesforce app has its own set of tabs, but the good news is you can rearrange the current tabs and add the ones you use regularly (as long as you have access). Customizing the navigation bar is straightforward.
To get started, click the pencil icon in the upper-right-hand corner of the app you want to customize.
To rearrange tabs, simply drag and drop them into your preferred order.

To add new tabs, click “Add More Items.”
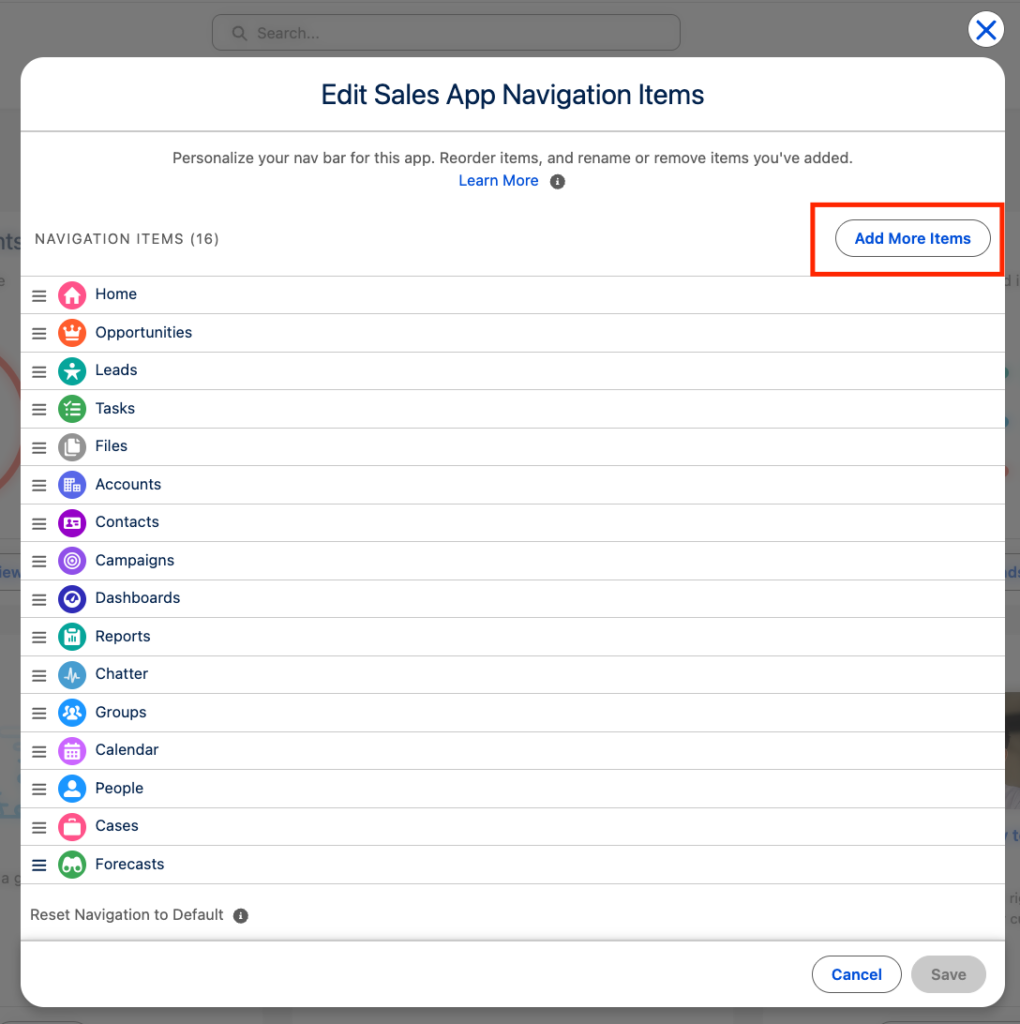
From there, select “All” under Available Items (Favorites is the default, but it may be blank if you haven’t customized before).
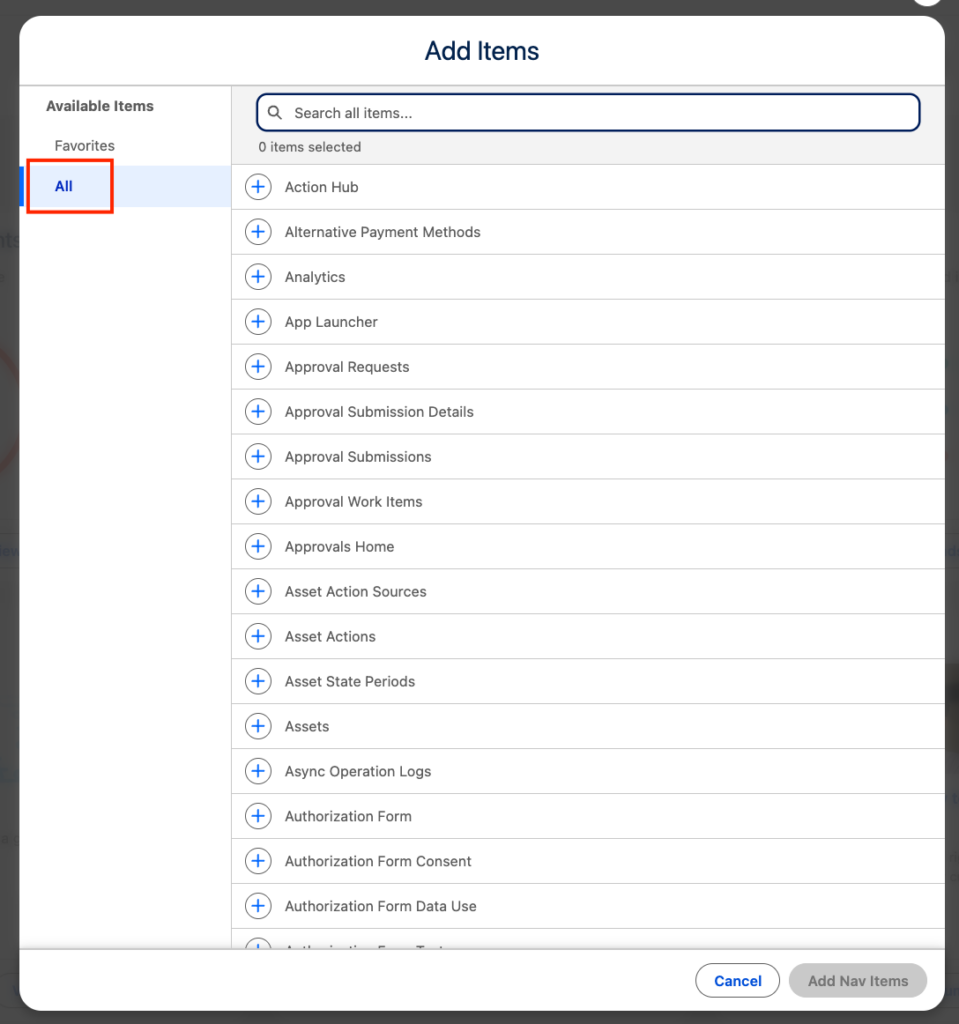
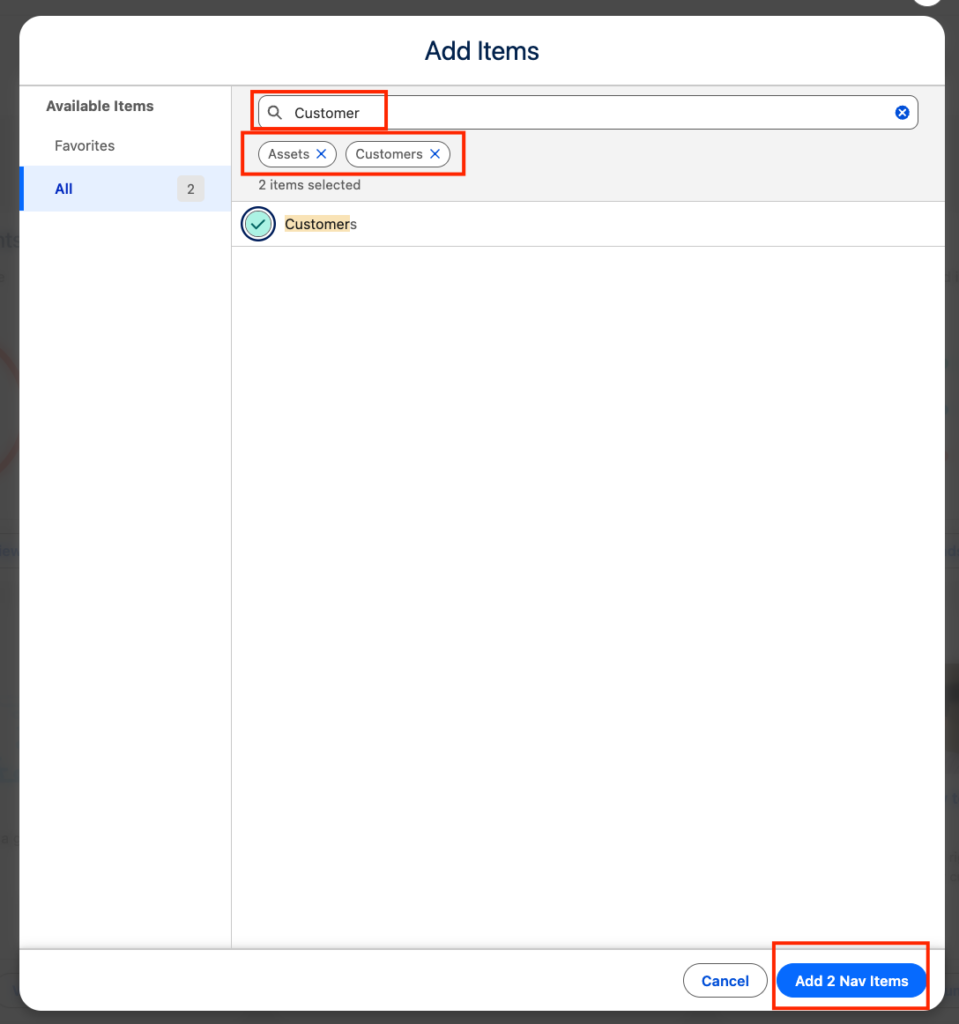
You can scroll or use the search bar to find what you need. Once selected, click the plus icon, then “Add Nav Items” at the bottom of the screen.
Back on the Edit Navigation screen, you can view the items added to your list, move your new tabs into place, and click “Save.”
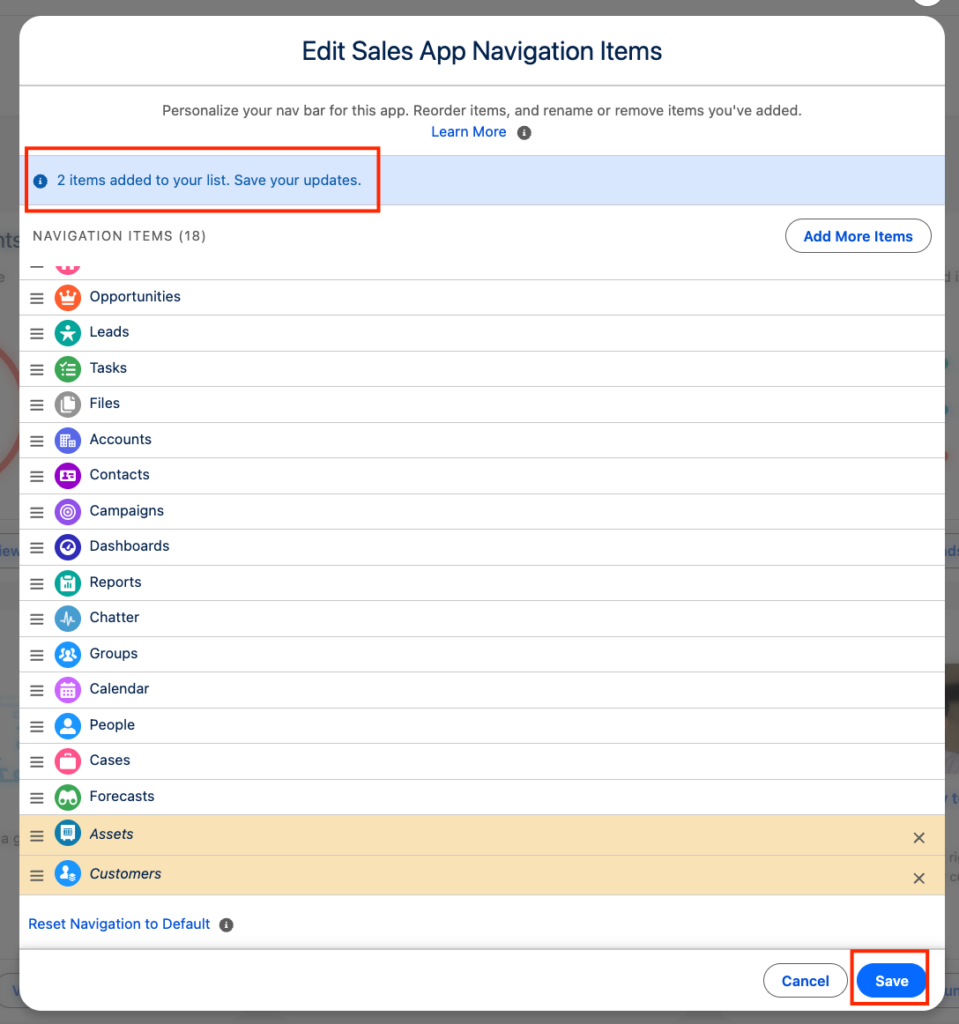
That’s it! You’ll now see your updated navigation bar.

Want to see this in action? Click the image below to check out CRM Besties’ video walkthrough:

Pretty cool, right? Now let’s make dashboards just as easy to access.
Bookmarking a Dashboard
Dashboards are the lifeblood of any organization, and getting to them should only take one click, not six.
There are two ways to bookmark a dashboard, so let’s explore both:
- Add it as a tab
- Add it to your Favorites
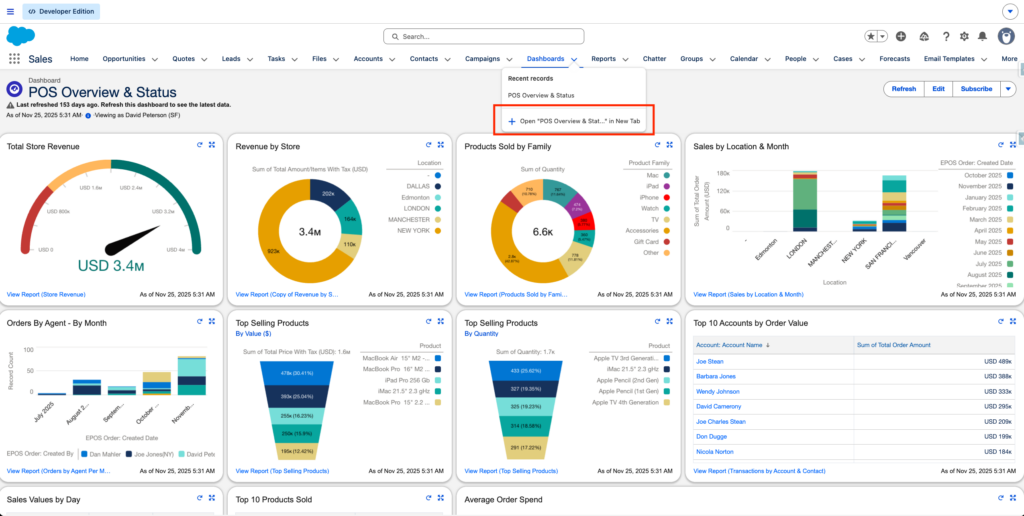
First, be sure to open the dashboard.
To add a dashboard as a tab
Click the dropdown next to “Dashboard” and select “Open ‘Dashboard Name’ in a New Tab”
In the new tab, click the dropdown again and select “Add ‘Dashboard Name’ to the Nav Bar”

You can see the Dashboard tab has been added

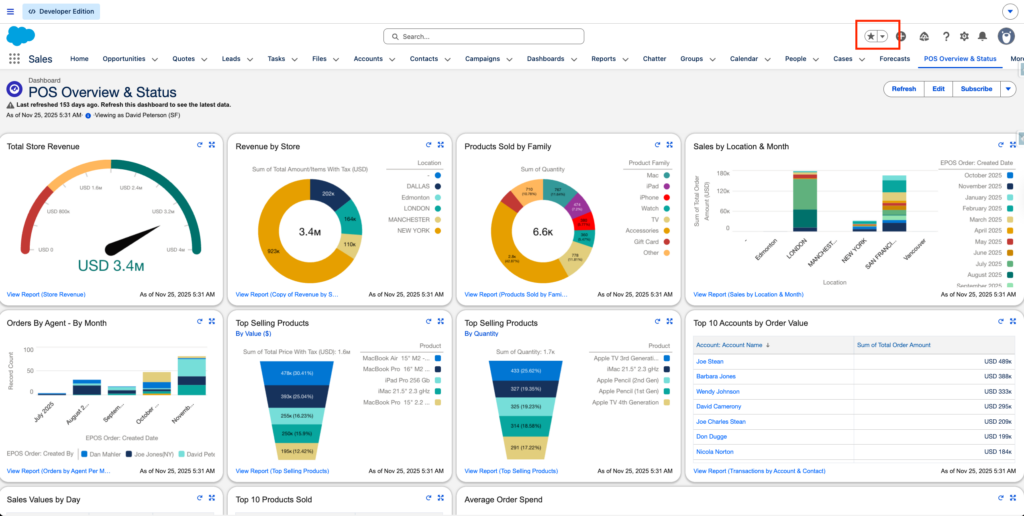
To add a dashboard to Favorites
Click the star icon in the upper-right-hand corner
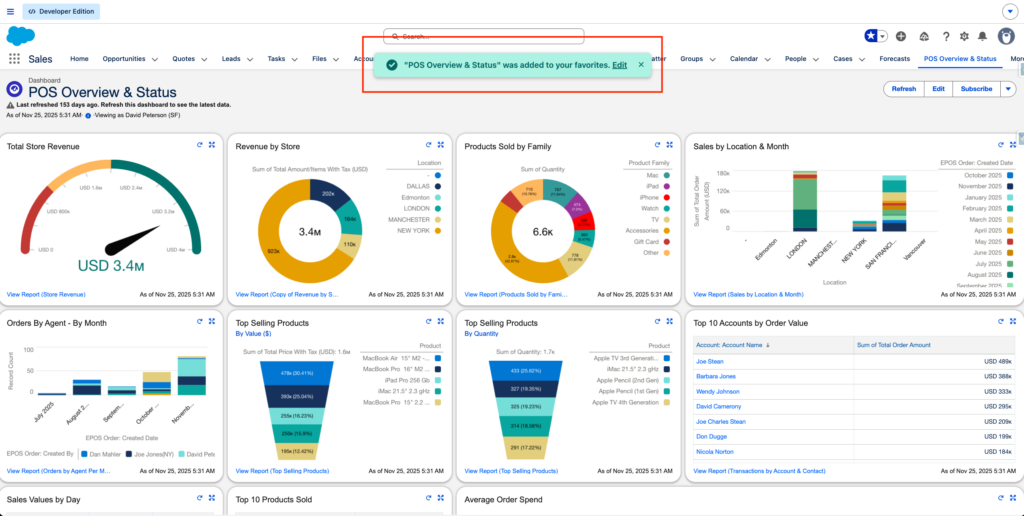
You will receive a notification on your screen that it has been added to your favorites.
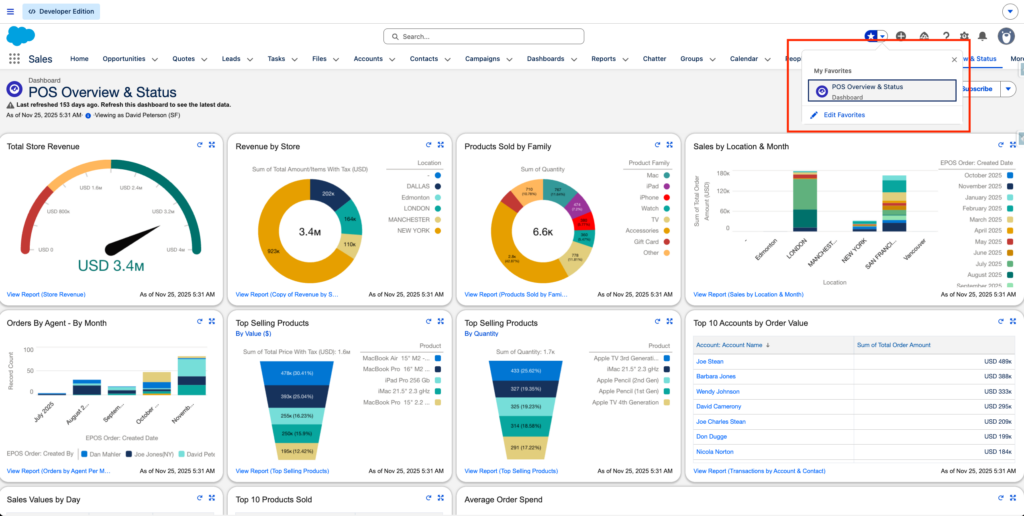
Confirm it appears in your Favorites dropdown by clicking the arrow next to the Favorites star icon.
CRM Besties has a great video walkthrough for this one too!

At this point, you’ve probably saved yourself a handful of clicks already, but we’ve got one more to go.

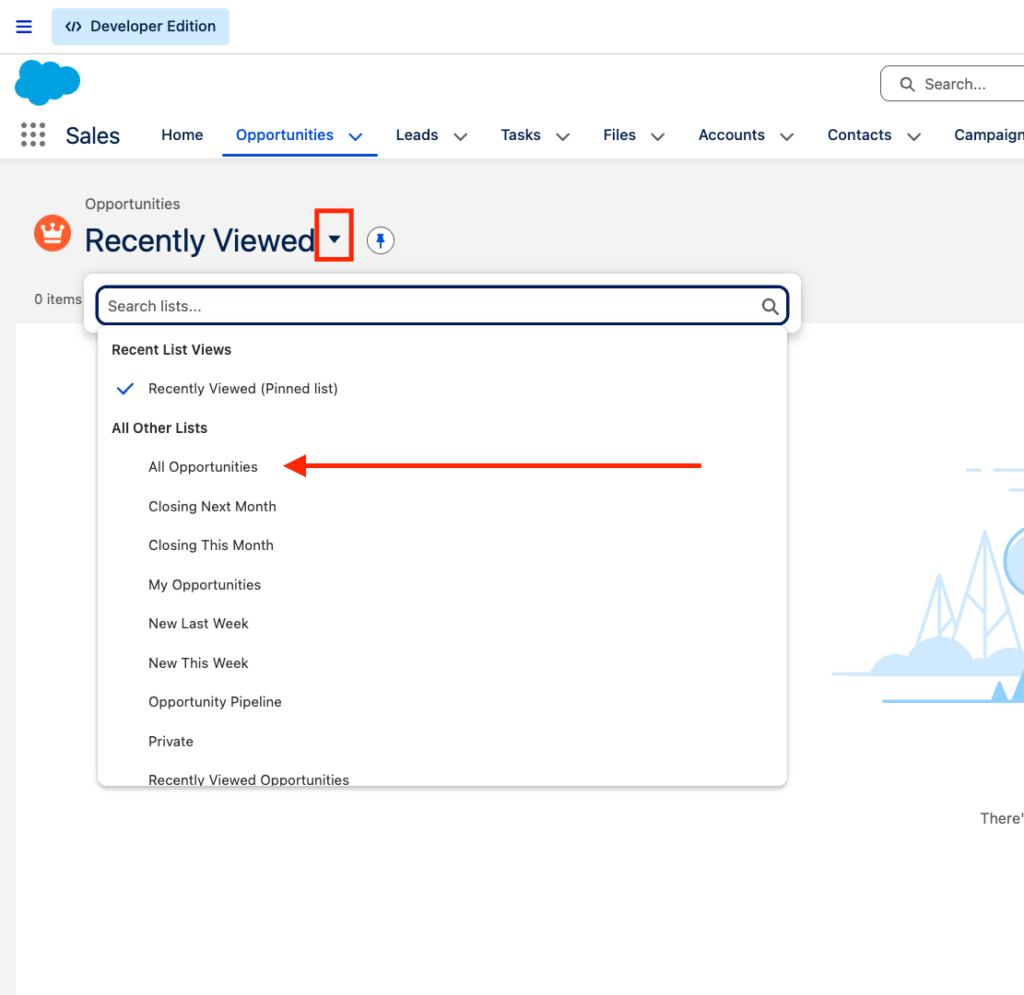
Pinning a Related List View
List views are the filtered lists that we work from every day. But Salesforce’s default Recently Viewed list isn’t ever enough. So if you find yourself clicking back to ‘All Opportunities’ for the 14th time, this is your sign that there is a better way. Stop clicking and start pinning.
Here’s how:
Open your object (we’ll use Opportunities as an example)
Click the dropdown arrow next to Recently Viewed and select your preferred list view (All Opportunities in our example).
Click the pin icon
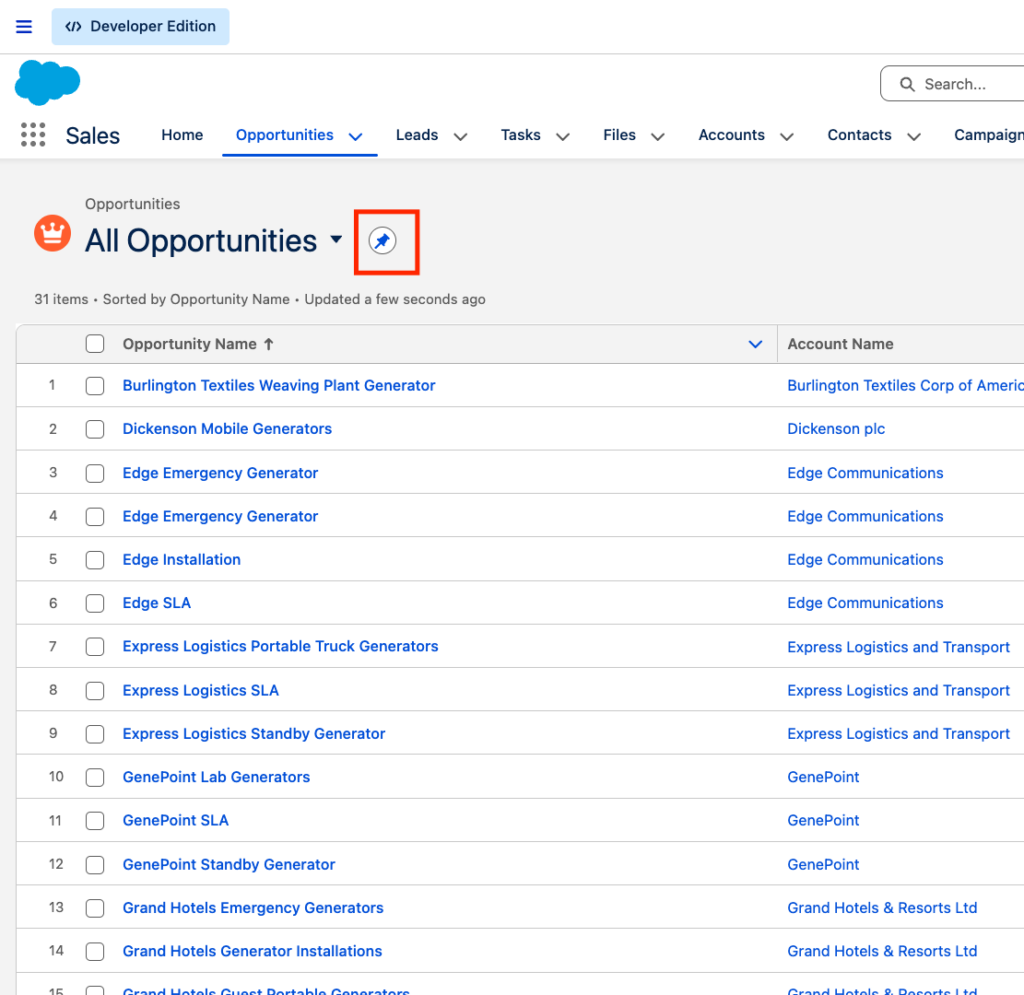
That’s it! Your selected list view will now be the default whenever you open that object.
If you prefer to stick with Recently Viewed and want to customize it, check out this CRM Besties video.
Important Things to Remember
- These customizations are personal; only you will see them
- Changes sync across devices since Salesforce is cloud-based
- Occasionally, updates may reset things, but now you know how to fix them
The Wrap
There you have it, three simple ways to customize your Salesforce experience. Which one will you try first?
Give it a shot and see what you think. Future you will thank you. And if you’re looking for more ways to improve your workflow, check out our other articles.
Follow CRM Bestie:
Want Even More Salesforce Career Content?
Watch Salesforce Career focused videos, listen to podcasts and check the menu items above for links to free content and courses.